my package of the day: fish – the friendly interactive shell

Always wanted to learn using a shell more deeply? Maybe „fish„, the „friendly interactive shell“ is the right kickoff for you.

If you are already a heavy command line user with customized .bashrc or even .zshrc (like me), thank you probably don’t need another shell. But if this shell thingy is somehow a miracle to you but you saw people using it like wizards with colorful commands and a typing speed that made you jealous then it could help you to start with a shell that concentrates on being very friendly to new users as common shells like Bash and ZSH expect you to read the manual and write a config file (there are aids and defaults that vary from distribution to distribution).

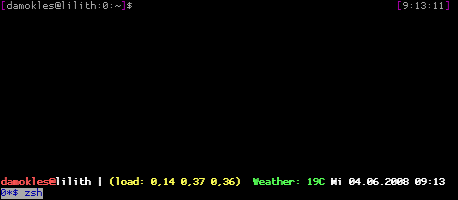
The standard shell for login users in Ubuntu/Debian is „Bash“. Ubuntu already ships the file /etc/bash_completion that is read by default and helps users using the TAB key more exensively. Try it on you bash shell: just type something like „ls –“ and press TAB twice. You’ll see a list of options that „ls“ provides. Nice but it could be nicer. Let’s compare this to fish. Install fish by using Synaptic or „aptitude install fish“, open a terminal and start the shell by typing „fish“. You should a changed green prompt. Now type „ls -“ and press TAB.

Stop: Already while typing you should see a strange color change. When entering „l“ the character turns red and underlined. Looks like an error? Well, it is: fish tells you, that „l“ is probably not a command. An aid during typing before running a command. Neat. Now, when pressing TAB you should a very clean list of options for „ls“ with a short description of each option:

fish11.png

Helpfull, isn’t it? Of course this is not limited to ls. Try it with other commands you are using. If you ask yourself why you have to type „command –“ and press TAB: „–“ introduces a command line option („-“ does this also – try it!). As you press TAB after this, the shells knows „the user wants to do something and needs help on completing it“. It looks after a pattern and sees that you want to use the given command and are looking for options. That’s all. As I said: This works in Bash often by default also, but not that nice.

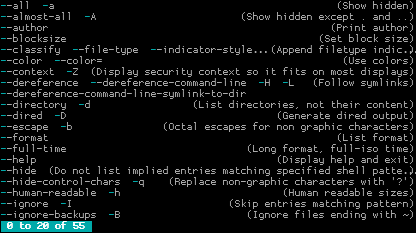
Now fish can do more with completion of course. Want to install a program? Try „aptitude install mut“ and press TAB. It will show you a list of packages matching that pattern:

fish2.png

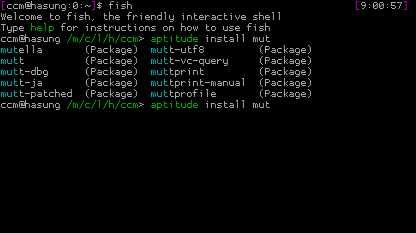
Need to kill a process? Type „kill “ and press TAB and you will get a nice list of running processes:

fish3.png

The list of possible TAB completions on fish is endless. Just notice that emphasis has been put on commands like mount, make, su, ssh, apt-get/aptitude. In most commands usernames, process ids will automatically be completed. The trick is just to try TAB when you are too lazy to type or unsure how to proceed. A good shell surprises you from time to time with it’s completion.

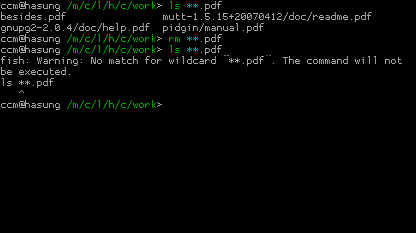
Also very helpful is the extended pattern matching for file names. Let’s say you want a list of all pdf files in a directory and all it’s subdirectories. On bash you probably use something like „find . -name „*.mp3“. On fish you use the pattern „**“ which means any files and directories in the current directory and all of its subdirectories. So type „ls **.pdf“ and you get the list you want as fish crawls through the directories for you. Want alle .mp3 and mp4 files but not files like .mpeg? Use „ls **.mp?“ as „?“ stands for one character. Of course commands like „rm **.bak“ are possible, too. Use them with care! In the following example we are looking for pdf files in all subdirectorie, delete them and afterwards make sure they are really gone:

bildschirmfoto-fish-mnt-cryptdevice-live-home-ccm-work-1.png

So let me stop here. I hope, I was able to show you that using fish instead of an unconfigured shell is a nice way of getting in the command line business. Fish provides you with a lot of more features that you might need and saves you from writing a config file from scratch.

If you want to give fish a try: Install it and run the „help“ command. I will launch a nice help page in you browser. Read some parts of the document as they’ll show you nice gimmicks. Or just don’t and start right away. But trust me: Reading hints for a shell from time to time will save you … time.

(Just in case you don’t know: You can change your standard shell by using the „chsh“ command. But when being a novice it is always a good idea to stick to the distribution specific default shell and run your shell directly by calling it. When you are more used to it feel free to make it your standard shell…)

my package of the day: weather-util (weather report and forecast for the console)

Let me introduce you today into a tool that a lot of people might evaluate as useless: Jeremy Stanley’s weather-util. Whith this tiny python script, which finally found its way into Debian Etch and Ubuntu repositories, you can retrieve weather information from weather stations worldwide directly from the command line.

After installing it by running „aptitude install weather-util“ or synaptec, call „weather“:

$ weather
Current conditions at Raleigh-Durham International Airport (KRDU)
Last updated Jun 04, 2008 - 01:51 AM EDT / 2008.06.04 0551 UTC
   Wind: from the S (180 degrees) at 10 MPH (9 KT)
   Sky conditions: mostly cloudy
   Temperature: 72.0 F (22.2 C)
   Relative Humidity: 73%

Pretty impressive, isn’t it? Weather just makes an http call to a weather server for a preset station (where the heck is Raleigh-Durham International Airport?) and returns the current weather information. Of course you can also retrieve the forecast for the next days by running „weather -f“:

$ weather -f
Current conditions at Raleigh-Durham International Airport (KRDU)
Last updated Jun 04, 2008 - 01:51 AM EDT / 2008.06.04 0551 UTC
   Wind: from the S (180 degrees) at 10 MPH (9 KT)
   Sky conditions: mostly cloudy
   Temperature: 72.0 F (22.2 C)
   Relative Humidity: 73%
City Forecast for Raleigh Durham, NC
Issued Wednesday morning - Jun 4, 2008
   Wednesday... Partly cloudy, high 67, 20% chance of precipitation.
   Wednesday night... Low 96, 20% chance of precipitation.
   Thursday... Partly cloudy, high 71, 10% chance of precipitation.
   Thursday night... Low 97.
   Friday... High 72.

Sadfully the forecast only displays Fahrenheit, but that way we have enough space for patching the package :)

Retrieving local weather information

Now we are, of course, we are interested in the weather in our area. The easiest way is getting the ID for a weather station. Just go to http://weather.noaa.gov/ and choose your country/city/station by using the drop down menus for US and international stations. When you found a station close to your point of interest you can see a four letter id in round brackets. See the example above – the airport has KRDU. I am using EDDI most of the times which is Berlin Tempelhof – an airport in the city center of Berlin.

So you are ready to ask politely for weather again by giving the id with „weather –id=ID“, in my case „–id=EDDI“. (note: you can also make it short with „-iEDDI“:

$ weather --id=EDDI
Current conditions at Germany (EDDI) 52-28N 013-24E 49M (EDDI)
Last updated Jun 04, 2008 - 01:50 AM EDT / 2008.06.04 0550 UTC
   Wind: from the E (080 degrees) at 13 MPH (11 KT)
   Temperature: 62 F (17 C)
   Relative Humidity: 59%

Please note: Not all weather stations support forecasts (-f) and drop a 404 http error. You just have to try this. You can also switch on „verbose“ mode (-v) which gives you even more details.

Weather on the command line without weather-util?

Works like a charm, doesn’t it? For the curious people around who want to understand where weather-util pulls the information from: See

http://weather.noaa.gov/pub/data/observations/metar/stations/

for reference. Just text files on a web server regularly updated. Click around and go to there parent dir – you’ll find even more interesting information. So using weather-util without weather-util should be not a big deal.

Screen integration

Now for the console lovers: You are using screen with a pimped status bar, don’t you? And in your wildest dreams you imagined the status bar showing the weather report, so you even don’t have to look outside the window because as a console guy you don’t even like your real „window“? No problem anymore by using screens backticks and weather-util.

As I noticed that weather-util runs into trouble from time to time when not being able to send it’s http request, I decided for a indirect weather pull by writing the information I need to a flat file by a cronjob. We just call weather-util and use awk to grab the snippet we need. I am interested in the temperature in Celsius. weather-util shows this line:

Temperature: 62 F (17 C)

So I use the following very quick and very dirty awk to get the „17“ out:

$ weather -iEDDI | awk '/Temperature/ {print $4}' | \
awk -F "(" '{print $2}'

Feel free to brush this up and report back. I am sure you can improve to use only one awk call instead of two.

You save this line to a shell script that is scheduled to run every five minutes and direct it via „>“ to write it’s output to a flat txt file. Within you .screenrc you read this file and display the contents in you status bar.
~/.screenrc:

startup_message off
defscrollback 1024
hardstatus on
hardstatus alwayslastline
backtick 1 0 300 cat /path/to/weather-text-file.txt

# remove line breaks made with "\"on the following lines
caption always "%{+b rk}$USER@%{wk}%H | %{yk}(Last: %l) %{gk} \
Weather: %1`C  %-21=%{wk}%D %d.%m.%Y %0c"
hardstatus alwayslastline "%?%-Lw%?%{wb}%n*%f %t%?(%u)\
%?%{kw}%?%+Lw%? %{wk}"

Make sure that have the file /path/to/weather-text-file.txt with the temperature in it. Now run screen and enjoy you shiny new status bar. See the green area in the screenshot below:
screen-weather.png

So that’s all for now. You should be able to play around with weather-util and screen to get the information you need (or let’s say „want“ :).

[update]

The incredible mnemonikk updated my awk | awk to a onetime sed within seconds:

$ weather -iEDDI | sed -n 's/.*Temperature:.*(\(.*\))/\1/p'

Thank you!

my package of the day: less (yes, less)

Let me tell you something about „less“: You are probably underrating it for no reason. Of course you know „less“ is always there and it does it’s job – showing files while being able to scroll backward – and some even use it instead of „tail“. But, hey, let’s examine some of the command line options to get more out of less:

-M: this option extends the prompt on the bottom. By default less in most cases just shows the name of the file it is showing, with „-M“ turned on, it also shows how many lines the files has, which lines it is currently showing and how far (in percent) you have gone. No killer feature, but nice to have.

-i: this option causes searches to ignore cases. A search for „pattern“ therefore also finds „PaTTerN“. You like this, don’t you? You like this even more, as this search still enables you to switch case sensitive search on by searching for a pattern containing at least one uppercase letter. A search for „Pattern“ for instance would still be case sensitive. If you even want to prevent this, you could use „-I“ which totally ignores cases.

-r: Sometimes getting warnings about binary characters? With „-r“ you tell less to display raw characters. This can help you when displaying files containing color codes. It is said that log files from Rails contain these types of code.

-c: Just a gimmick to redraw the screen more clearly by beginning from the top line instead of scrolling. This might result in a slightly increased data transfer rate when using ssh but can improve usability.

-a: This causes less to skip found search patterns when pressing „n“ not from item to item but from page to page. You might know the pain when searching for a pattern that comes up more than once on a page and you start hammering „n“ getting confused on what you have already seen and what not. This options just skips at least the current page before displaying the next found pattern while still marking all patterns of course.

-f: This can help you in conjunction with „-r“ to force the display of raw characters without being questioned again.

Confused about the sequence of the options? Don’t be:

$ less -Mircaf

is something you just learn or create an alias for.

This one, to sum up the options, will display an extended prompt, ignores cases in searches, while being able to switch them on, skip found search patterns at least per page, display raw characters like color codes without asking and redraws the screen as good as possible.

Another feature that should be mentioned is the „follow file“ mode that some of you might know. It is similar to tail as it shows you the content of a file that gets appended while viewing. You turn this mode on by pressing „F“ (uppercase F). The advantage over tail is that you can interrupt the mode by pressing ctrl-c and scroll back though still being able to return to follow by pressing „F“.

Not so familiar is the fact that you also can jump into the follow mode from the command line:

$ less +F

starts the follow mode immediatly. Of course typing „+F“ on the command line is not sophisticated as typing „tail“ but you can create an alias for it like „ltail“ or whatever you like.

As a summary:

$ alias eless="less -Mircaf"
$ alias ltail="less +F"

gives you two new commands. „eless“ as an extended less provides you with the described features. „ltail“ simulates „tail“ but enables you to jump back to the normal less by pressing ctrl-c.

Instead of creating an alias for „less -Mircaf“ you could also use the environment variable „LESS“:

$ export LESS="-Mircaf"

A credit goes to mnemonikk, who was just too lazy to blog this.

Please note: As less is still being developped, command line options might slightly change. For instance in newer version „-R“ instead of „-rf“ might lead to the same result. Just try it or check the version of less you are running („less –version“) against the official less changelog.

my package of the day: irqbalance

Maybe you are in the nice situation of running machine with multiple cpu cores having to crunch a lot of numbert or providing network daemons. Multiple cpu cores can boost your performance dramatically but there are, of course, possible issues. On is the fact, that interrupts by default are mainly called by the first cpu. As applications that aren’t able to thread correctly can stick to this cpu you might notice by a „cat /proc/interrupts“ that something goes wrong. The following is a (compressed) /proc/interrupts from a live server running for about ten weeks:

           CPU0       CPU1
  0: 1855681242        574  timer
  7:          0          0  parport0
  8:          1          0  rtc
  9:          1          0  acpi
 14:         65          0  ide0
 58:          4          0  ehci_hcd:usb1, uhci_hcd:usb2
 66:  212905125         72  3w-xxxx
 74: 1094755762          0  eth0
185:    6223686          0  uhci_hcd:usb4, eth1
193:       1978          0  uhci_hcd:usb3, libata

You can see, that actually all interrupts are called by CPU0. We want to brush this up! How? Just run a „aptitude install irqbalance“ as irqbalance promises:

Daemon to balance interrupts across multiple CPUs, which can lead to better performance and IO balance on SMP systems. This package is especially useful on systems with multi-core processors, as interrupts will typically only be serviced by the first core.

So let’s check after about one week by another „cat /proc/interrupts“:

           CPU0       CPU1
  0: 1887385089   33827155     timer
  7:          0          0     parport0
  8:          1          0     rtc
  9:          1          0     acpi
 14:         65          0     ide0
 58:          4          0     ehci_hcd:usb1, uhci_hcd:usb2
 66:  212950265   11810501     3w-xxxx
 74: 1310191290          0     eth0
169:          0          0     uhci_hcd:usb5
185:    6223686     228881     uhci_hcd:usb4, eth1
193:       1978          0     uhci_hcd:usb3, libata

Nice, isn’t it? CPU1 started to grab interrupts also. If we would reboot the server, most of the irqs would look balanced over time. (most, not all)

Please notice:

Before installing irqbalance, check your /proc/interrupts. It might be possible, that you don’t need it though you have multiple cores as there is a value „CONFIG_IRQBALANCE“ in 2.6 kernels that can be turned on.

[update]

The comments (thank you!) pointed out the following:

  • There are reports on crashed systems using irqbalance. (Though I have never seen anyone by myself)
  • Note that irqbalance is not in main – if you are using it on an important server.
  • CONFIG_IRQBALANCE seems to be enabled in Bbuntu Hardy by default.
  • There are discussions about removing CONFIG_IRQBALANCE as it is said that irqbalance is more reliable.

So it is up to you to decice which one to use!

[update2]

Actually a glance on  /boot/config-2.6.24-17-generic shows, that CONFIG_IRQBALANCE seems not to be enabled in Hardy though the balancing seems to work. Actually I am not one of the kernel guys so my investigation will take it’s time. Any hints welcome (thank you lissyx).

removing outdated ssh fingerprints from known_hosts with sed or … ssh-keygen

At least from the last issue in Debian-based systems including Ubuntu you might know the pain of getting the message from you ssh client that the server host key has changed as ssh stores the fingerprint of ssh daemons it connects to. Actually this is a neat feature because it helps you detecting man in the middle attacks, dns issues and other things you probably should notice.

Until recently I opened the file .ssh/known_hosts in vim, deleted the entry, saved the file and started over again. I randomly checked „man ssh“ which gives you a lot of hints about the usage of known_hosts but I just did not find information about how to delete an old fingerprint or even overwrite it. I imagined something like „ssh –update-fingerpring hostname“ with an interactive yes/no question you cannot skip. There is the setting „StrictHostKeyChecking“ that might get you out of the fingerprint-has-changed-trouble but it does not solve the real problem as you want those checks.

So after hanging around with Mnemonikk discussing this he pointed out a very simple method with „sed“ that is really handy and helps you understanding sed more deeply. You can advise „sed“ to run a command on a specific line. So have a look at this session:

1
2
3
4
5
6
7
8
9
10
11
12
13
14
$ ssh secrethost
@@@@@@@@@@@@@@@@@@@@@@@@@@@@@@@@@@@@@@@@@@@@@@@@@@@@@@@@@@@
@    WARNING: REMOTE HOST IDENTIFICATION HAS CHANGED!     @
@@@@@@@@@@@@@@@@@@@@@@@@@@@@@@@@@@@@@@@@@@@@@@@@@@@@@@@@@@@
IT IS POSSIBLE THAT SOMEONE IS DOING SOMETHING NASTY!
[...]
Offending key in /home/ccm/.ssh/known_hosts:46
[...]
Host key verification failed.
$ sed -i "46 d" .ssh/known_hosts
$ ssh secrethost
The authenticity of host 'secrethost (1.2.3.4)' can't be established.
RSA key fingerprint is ab:cd:ef:ab:cd:ef:ab:cd:ef:ab:cd:ef:ab:cd:ef:ab.
Are you sure you want to continue connecting (yes/no)?

We just took the line number 46 which ssh complains about and run in in-place-editing mode (-i) with the command run on line 46 the command delete (d). That was easy, wasn’t it? Small lesson learned about sed. Thank you Mnemonikk (he is currently working on a screencast about screen if you let me leak some information here :).

But to be honest I’s still looking for the „official“ method the delete a key from known_hosts. Therefore I browsed through the man pages and finally found what I was looking for in „man ssh-keygen“. Yes, definitely zero points for usability as deleting with a tool named „generator“ is confusing but it works, however. You can advice ssh-keygen to delete (-R) fingerprints for a hostname which helps you when you turned hashed hostnames on in you known_hosts:

1
2
3
4
5
6
7
8
9
10
11
12
13
14
15
$ ssh secrethost
@@@@@@@@@@@@@@@@@@@@@@@@@@@@@@@@@@@@@@@@@@@@@@@@@@@@@@@@@@@
@    WARNING: REMOTE HOST IDENTIFICATION HAS CHANGED!     @
@@@@@@@@@@@@@@@@@@@@@@@@@@@@@@@@@@@@@@@@@@@@@@@@@@@@@@@@@@@
[...]
Offending key in /home/ccm/.ssh/known_hosts:63
[...]
Host key verification failed.
[ccm@hasung:255:/etc/ssh]$ ssh-keygen -R secrethost
/home/ccm/.ssh/known_hosts updated.
Original contents retained as /home/ccm/.ssh/known_hosts.old
[ccm@hasung:0:/etc/ssh]$ ssh secrethost
The authenticity of host 'secrethost (1.2.3.4)' can't be established.
RSA key fingerprint is ab:cd:ef:ab:cd:ef:ab:cd:ef:ab:cd:ef:ab:cd:ef:ab.
Are you sure you want to continue connecting (yes/no)?

So „ssh-keygen -R hostname“ is a nice syntax as you even do not have to provide the file name and path for known_hosts and it works with hashed names. Nevertheless I’ll also use the sed syntax – keep it trained it’ll help you in other cases also.

Ubuntu BBQ on 31th of May – End of Linuxtag

Ubuntu Berlin strikes again! On the 31th of May, this Saturday (and last day of the „Linuxtag“), Ubuntu Berlin is proud to present the „Ubuntu BBQ“ – an event you should not miss when staying in Berlin for attending „Linuxtag 2008„, live here or happen to be around by chance.

Hosted again by the sunken starship „c-base“ we are happy to provide you with drinks at low prices, and BBQ and entrance for … free! Sponsorships from Canonical Ltd. (you might have heard of them) and ubuntu Deutschland e.V. (thank you!) and an invitation from the Linuxtag Community staff made this possible and we are anxious to see how many Linuxtag attendees make their way to the base.

But it’s not about eating and drinking: The event gives you the possibility to meet a lot of GNU/Linux and Ubuntu interested folks, even some of the well known free software gurus in a relaxed atmosphere. Of course you can use a free wifi network with you notebook/gadget/whatever, but don’t forget: It’s a party. Music will be around and you can sit directly at the rivercoast of the „Spree“. It’s said the weather will be great.

You are invited the join us starting from 4 pm – the BBQ will start from 7pm – so you have enough time to come over from Linuxtag. We will arrange some groups you can join on Linuxtag making it easier for you to find the c-base. See more on our (yet only German) announcement.

Ubuntu landed on Berlin metro system

The guys from „Berliner Fenster“, a company responsible for the content of the television system installed inside underground vehicles (more than 3.700 displays) were so kind (thank you!) providing us with a spot for our release party this Saturday for free. So just on time with the release starting from today there are small spots viewable by an audience of about 1.5 million people per day according to their web site.

Don’t trust me? See this:

and this:

And come over on Saturday, the 26th of April to our release party. Lectures, demonstrations, freshly burned cds, a live Samba band, a button machine and Daniel Holbach as Drum’n’Bass dj and of course dozens of helpful and open source minded people are waiting for you. Entrance is free.

Daniel Holbach going to rock the turntables at Ubuntu Hardy Heron release party

I already told you about our shiny Ubuntu Hardy Heron release party on the 26th of April at the sunken starship c-base right here in Berlin, haven’t I? While the schedule is already a must-come: seven talks/presentations, not only from community members but also from friends like the Free Software Foundation Europe, a live Samba band, the chance to hang around directly at the river bank of the Spree while having free wifi turned on, I am proud to announce that our dj team just got doubled: This time Ubuntu developer and MOTU Daniel Holbach himself will bring his turntables and show us what his interpretation of a drum’n’bass dj set is. He’d just say „rock on“ and so are we. If you want to give his mixtapes a try, just check out the very category at his blog.

Hope to see you Berlin folks this Saturday (German folks even – just enter a train, car or whatever). Feel free to contact me directly there, I am always happy to see new faces.

Why I won’t install Ubuntu on my OLPC XO (for now)

As you might have noticed, a couple of days ago I finally received my OLPC XO. Of course installing an Ubuntu flavor was one of my major tasks for the first time, but…

… after booting the XO for the first time there is something like a cultural shock: The XO gui „Sugar“ is totally different from what you might have used before. After recovering from that clash you start getting a clue what the small white-green device with the „bunny ears“ called wifi antennas is about. It is about local communities, learning collaboration and creativity. So there is a huge difference between using an EEE Pc and using a XO. The EEE PC came with a Linux gui (Xandros flavor) that was just not what I wanted and as the EEE is actually nothing more than a small and cheap version of a common notebook, installing Ubuntu (yes, even the normal Hardy desktop version) seemed rational and indeed works like a charm.

The XO is different from that: It’s ability to share most applications, the strange network and neighborhood views, the display (that is definitely worse than EEE’s when using color mode but unbeatable when using the greyscale mode in sunlight), the strong wifi antennas invite you to play around with a different approach to work. There are even limitations that enforce not switching back to „normal“: The quite limited ram (256Mb) and Sugar’s limit for only running a specific number of applications invite you to concentrate and focus. Of course you suffer a bit from being forced to use „yum“ on the console when installing applications that are actually not meant to be installed or don’t integrate into Sugar. They are not „Activities“ as Sugar-applications are called. (Besides: „Activity“ is a nice naming convention in my eyes.)

So what about Ubuntu? It’s not only about running it on the XO. You prolly know projects like „It runs doom“ (yes, the OLPC runs doom but somehow you feel wrong about it) trying to run specific software on as many devices as possible. We know Ubuntu will run and it already does. But the task is to take the challenge of providing something different, something focused. There is a blueprint already that gives hints on what is to do: Ubuntu for the One Laptop Per Child Project. It outlines the necessity of providing collaboration software, mesh network support and more of those things you don’t think about in the first when reaching for your notebook. At the end of the day this gives you the possibility to reach an audience you’d never dare to dream of before. So keep on hacking the XO and don’t stop after launching *buntu on it. We can do more.

13 phases for getting sugar: My odyssey to the OLPC XO

What a journey! It took four and a half month for me to get my OLPC XO. If you are interested in the journey, read on. I just need to tell it somebody 😉

Phase 1: Being an alien

I ordered the OLPC XO quite early through the Give 1 Get 1 program as I thought the idea is fine to support and I was really interested in the device. Not only in the hard- but also in the software and the complete package. So in mid November 2007 I tried to order, but… I live in Berlin/Germany and in the beginning there was no way for me to order. The web form was only able to handle requests from the States (and Canada I think?). Though I already made contact to a friend who was willing to be my delivery address in the U.S. the payment with European credit cards was impossible. But just a couple of days after the start of G1G1 I noticed you could order the laptop via phone.

Phase 2: Being a hero

So after calculating the time zone difference I called the G1G1 support and ordered the laptop by phone. Sounds easy but try to image waiting on a phone for half an hour, ordering in a different language than your native language while having to spell names, addresses and your credit card number. But hey: I was sure to get the device right before Christmas so I could show off with it at the 24C3 CCC hacker convention.

Phase 3: Being a loser

Of course really nothing happened. All I got was an annoying mail at some day telling me about my bad luck and having to wait for an actually unspecific amount of time and and offer of a postcard for youngsters explaining why the laptop will be delayed. So I had to join the hacker congress without gadget while having to see at least ten or more of XOs flying around there. Bad luck, really bad luck.

Phase 4: Being a cheater

In early 2008 a friend showed up who ordered two EEE pcs by chance and asked me if I want to have one of them. As I really yearned for a small device I decided to break my own rule and bought the EEE while feeling political incorrect.

Phase 5: Being a clown

After weeks a hidden link to a form showed up somewhere in the web where you could track the status of your shipment. Something seemed to be wrong with my order. So I took the time of hanging one and a half hour on hold. Afterwards an even worse than me speaking Indian callcenter agent told me that the delivery address was incorrect and we needed half an hour to correct it. No joke.

Phase 6: Being a monk

At least in early March I had given up my hope and tried to think that maybe someone somewhere is happy with one or two laptops funded with my credit card. Really – I started telling people that I did not expect the XO to be delivered and I really did not. I triend to get happy with my EEE, installing Ubuntu Gutsy and Hardy on it.

Phase 7: Being a zombie-child

Then it came. The very mail: My XO has been delivered. FedEx tracking number. I jumped like a child. But hey: Where the heck has it been delivered? My friend did not receive it. The signature from FedEx showed a name like „Jon Doe“ and I started getting angry. FedEx should stated they are out of business when somebody subscribed the package. Maybe I did not get the meaning of the combination of name and delivery address…

Phase 8: Being a child again

A couple of days later the package was found (picked up by a friendly neighbor). It had a totally false name on it, but hey, it has been found!

Pase 9: Being a scientist

Now it was time to manage a shipment from Los Angeles to Berlin while trying to get it fast. Ever tried to order a shipment by yourself? At the very first try you have to be a scientist. Tax rates, duane, weight, shipment type… But I got really nice support from my friend. Delivery price: over 100 USD. Ouch.

Phase 10: Being a driver

While FedEx managed to bring the package within three days (Friday to Monday) they also managed to inform me as late as possible on Monday that I wasn’t at home though I already called them in the morning. Bad luck again. But hey, I called their office in the afternoon and managed to get an address where it was possible to pick up packages manually until 8 p.m. So shortly about 8 p.m. I finally got my package.

Phase 11: Being an opener

So finally: Yesterday evening I’s able to unpack my own white-green-froggy-style thingie and plugging it into…

Phase 12: Being an idiot

… nothing because I could have been smart enough to think of American style power supplies. Guys, you really have crappy power outlets. This looks rather like a hobbie thingie than a serious voltage carrier. But in my bad luck at least the batterie had some power left so I’s able to hack around for at a couple of hours.

Phase 13: Being normal again

Tuesday, the device is still there yearning to be hacked. I picked up a converter for the power supply and that’s end of the story. Being on sugar now.

To give you some totals of this odyssey: I had to wait four and a half month for the XO and spent at least 550 USD for it (400 for the G1G1, 40 for the delivery to the US, 100 for the delivery to Germany and 10 for a converter). That hurts again and again but thats the price for being a first mover if you can say so when waiting that long.

p.s.: This post is not a rant about the delivery process though it really got on my nerves. I appreciate the effort for the project but also I have to state that these guys really need some managing hints. When thinking worldwide you have to make sure you are able to deliver within a reasonable amount of time. Lesson learned, I hope.